The trick in setting up voicemail for a toll-free number is to understand that voice mailboxes are only assigned to properly licensed user accounts and that all users are automatically assigned voice mailboxes. From an architect and administrator perspective this means:
- as voice mailboxes are only accessible via user accounts, calls are effectively redirected to a user account (aka 'Person')
- since a user account is needed it must be properly licensed and thus budgeted
- user voice mailboxes are managed by the user in Teams not by the administrator; this means that one needs to log into the designated 'voice mail' user account to setup corporate greetings and voice mailbox parameters; it also implies that administrators need to keep track of these 'corporate' or 'admin' type user accounts
Steps
- Create an Azure Active Directory user account
- Assign licenses
- Update auto attendant steps to direct calls to the voice mailbox user account where appropriate
- Log into the voice mailbox user account and setup voice mail greetings and other parameters
- Forward voicemail to a user account that can action the voicemail - a receptionist, sales manager, inside sales, or integration user account for Dynamics 365!
Create an AAD user account
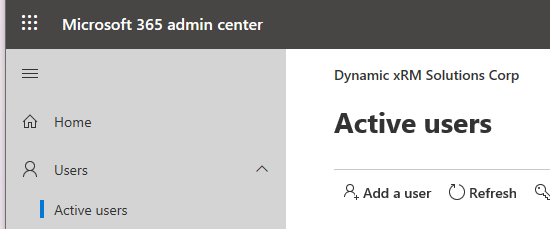
- Open your Office 365 and go to the 'admin center' (click Admin on the menu in my version of the dashboard)
- Click Users and New
- Name the user a name appropriate to your naming conventions or to its function - 'corporate voice mail' for example.
- Note that the Display name is not visible to a caller on a phone (aka it does not show as the caller id). It does show for Team users in the unlikely event that they phone the toll-free number. Since external Team contacts could see the Display Name it is recommended that it presents a meaningful label.
License the user account
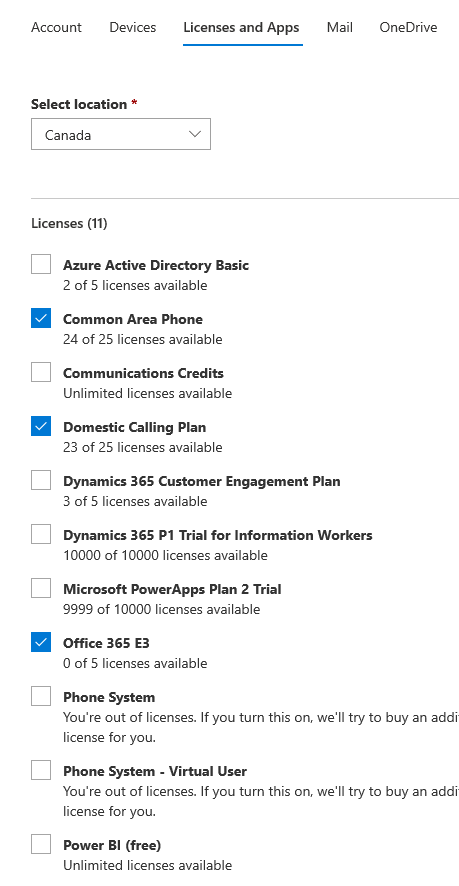
- Once created, click 'Licenses and Apps' to display the available licenses.
- The user account requires the following licenses:
- Common Area Phone license. This used to be the Phone System license for Skype for Business and is necessary for enabling a user account to be 'Voice Enabled'
- A calling plan - for example, Domestic Calling Plan. This is needed to 'tag' the user account as an Enterprise Voice user account.
- A Teams license - for example, an Office 365 'xx' license will provide a Teams license. This is necessary to acquire and manage voicemail. Alternatively, you can license with Business Essentials - this would be less expensive (it is at the time of writing); the key is that the license provides the user account an Exchange mailbox and a Teams license.
- NOTE: I found that it was necessary to assign the 'Communications Credits' license to the voice mailbox user so it can be selected as a 'Person' during Team Voice configuration. I was able to later remove it without an issue suggesting it was not really necessary for configuration or the act of assigning the license was all that was necessary to make the user an 'Enterprise Voice' user account.
- NOTE: You will find an annoying delay between assigning a license and having the license becoming 'active' in Teams. Generally it took minutes for a license to be 'active'. Thus, once licensed per above, voicemail was not created in the first immediate tests.
Update the Auto Attendant
- Open Teams Admin (In Office 365 click Admins then Teams (you many need to click Show All before Teams is visible)
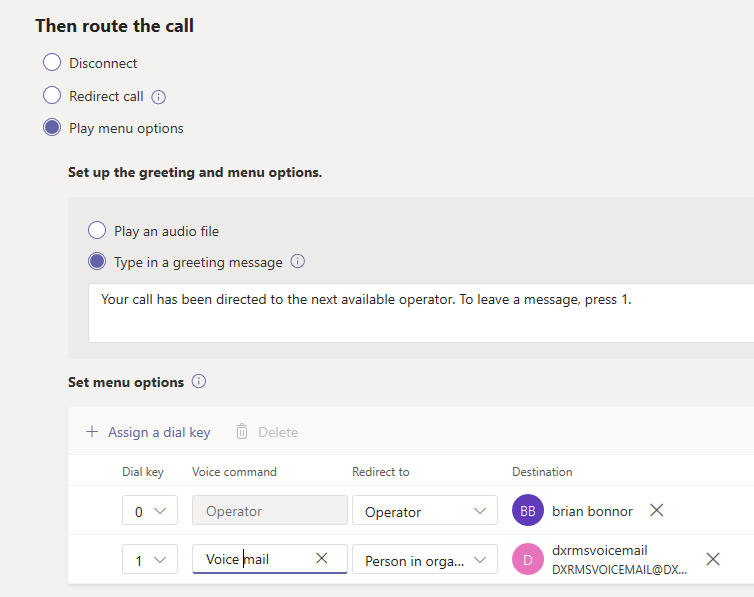
- Click Voice then Auto Attendants
- Skip forward on the existing Auto Attendant configuration to the points where voice mail is desired. For my user story, a user is able to select voice mail immediately after connecting by pressing 1. Users will also be able to get to voicemail if no one picks up their call or if the office is closed.
- Submit changes when complete

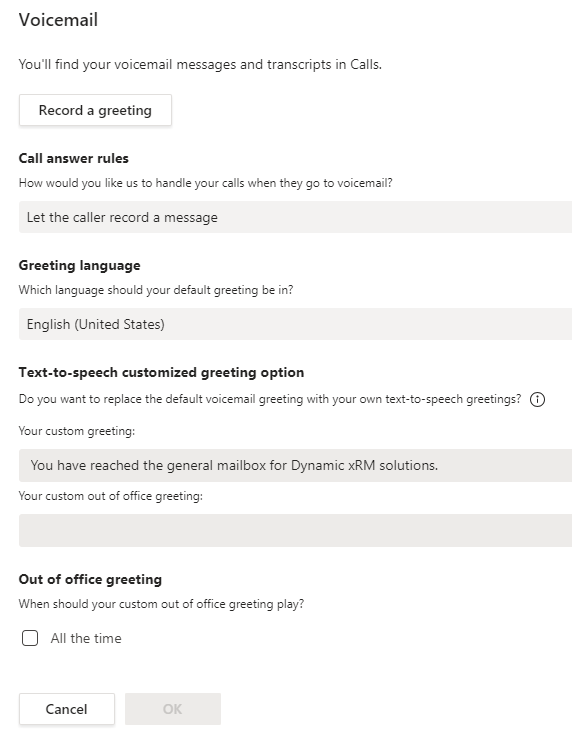
Update Voice Mailbox Greeting
- If you test the toll-free number setup without setting up the voice mailbox of the 'voicemail' user account, the caller will be presented with a statement that the mailbox is not yet setup even though the immediate next comment is to leave a message. To be clear, voicemail is active and working but the greeting is wrong and confusing.
- Open Teams Desktop edition (download and install if needed)
- Log out as yourself and log in as the voice mailbox user
- Click the icon in the upper-right corner showing your initials and select Settings
- Click Calls menu option on the right-side of the window
- Click 'Configure voicemail' button
- Click OK to save changes
- Close the Settings window when complete
Forward the voicemail
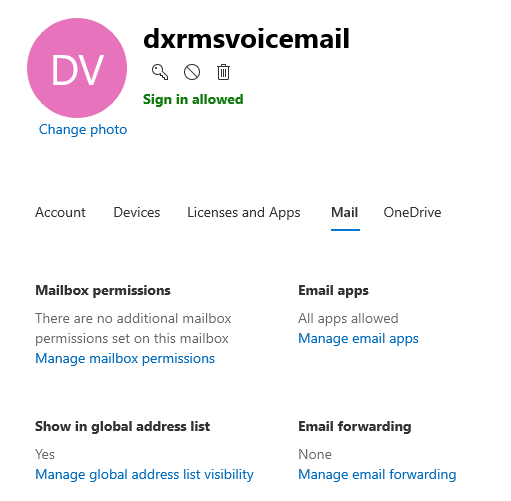
- From the Office 365 admin center, display a list of users and select the VoiceMail user account
- Click Mail tab (on right-pane). NOTE: If the user doesn't have the proper licensing it will indicate the user doesn't have an Exchange license
- Click Manage email forwarding
- Assign an email address that will receive the voicemail
- Recommended that the copy is kept within the VoiceMail user's account. NOTE: This ensures a copy is retained in a centralized location, however, it does mean that the voicemail mailbox will need to be managed from time to time.